01
Collect all items and let's start!

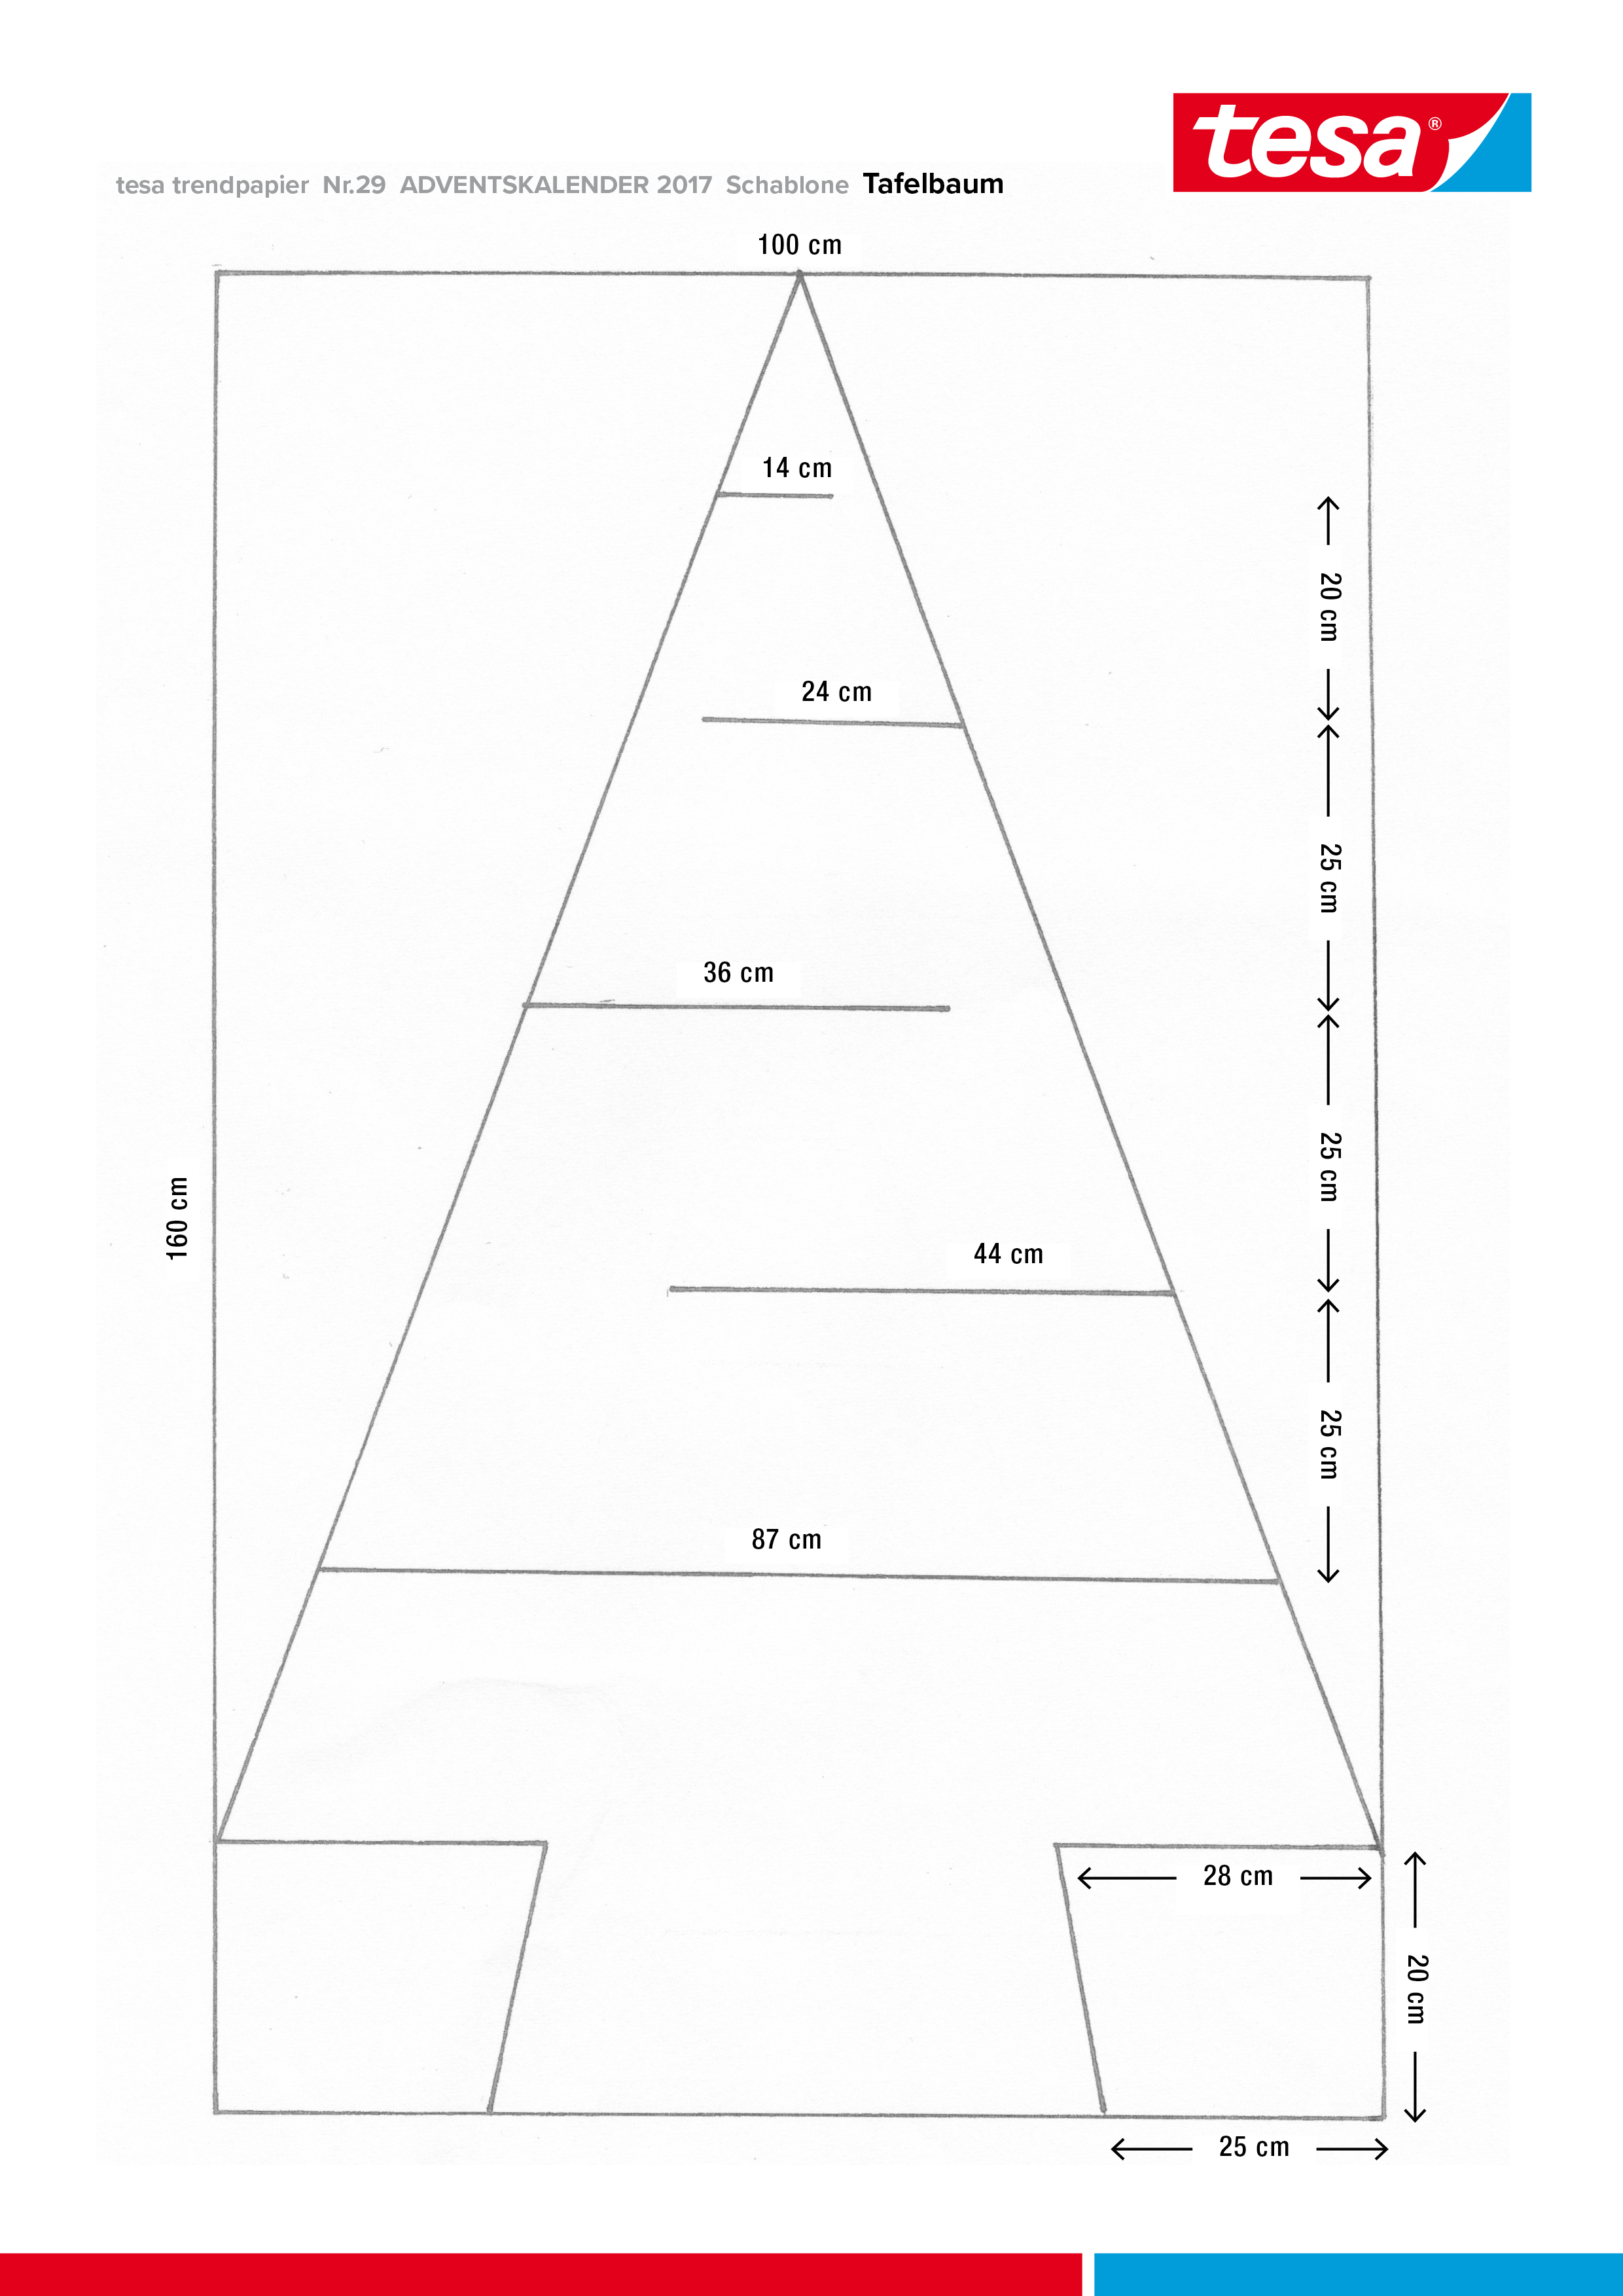
For this kids Advent calendar, a tree is painted on a wooden board using chalkboard varnish, and then decorated with school chalk. Powerbond tape is used to fix the shelves holding 24 small parcels.

Collect all items and let's start!

Transfer the outlines of the tree to the board using a pencil, place the wooden trims as indicated on the template and mark them with a pencil.

Transfer the lateral diagonal lines of the tree to the external edges of the angle trims and saw them off obliquely. The trims are glued to the board along the 3-cm sides.

Apply tesa Powerbond® Ultra Strong on the previously cleaned, 3-cm sides of the trims and cut to fit. Press the tape firmly on the trim for 5 seconds; then peel off the protective film.

Press the trims firmly for 5 seconds on the marked areas of the previously cleaned board.

Mask the outer borders of the tree, using tesa® Masking Tape Perfect. At the corners, cut the masking tape at an angle so that it fits seamlessly and cleanly.

Paint the tree with the chalkboard paint.

Allow the paint to dry and remove the masking tape. Now decorate the tree with your Christmas ideas.
![[en-en] 55791 - tesa Powerbond Ultra strong LI408](/en/files/images/202402/2/medium-11177008,11177008_padded1x1_18.webp "tesa_4042448217349_55791-00000_LI408_front_pa")