01
Collect all items and let's start!
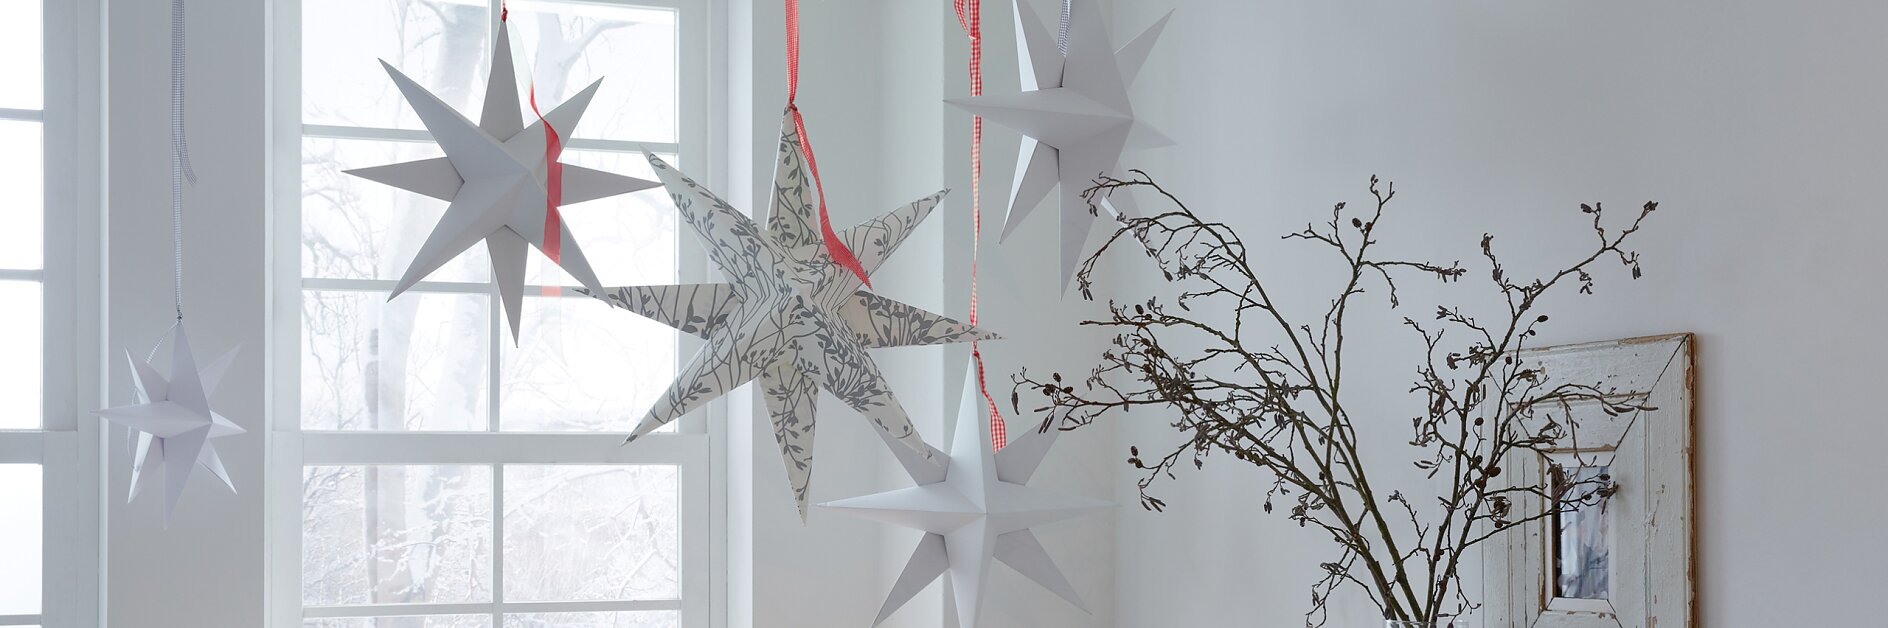
Attention, snuggle alarm! Floating above your favorite place there are huge, homemade folded stars made of robust paper. They are held by ceiling hooks that can be removed without a trace after the holiday.
Collect all items and let's start!
Cut two squares per star out of the papers. Large star 53 x 53 cm, medium-sized star 45 x 45 cm, small star 30 x 30 cm. If using patterned papers put the pattern inside! Fold the square in half and firmly crease the fold line with the folding stick, unfold and fold the other side in half.

Turn the square and fold diagonally 2 x.
Unfold, the folded lines now look like how they are depicted in the Figure.
Turn square and put markings on the crease of the straight edges toward the top as follows: large star 11 cm, medium-sized star 9.5 cm, small star 6.5 cm.

Cut open the edges up to the markings.
Fold to the diagonal folding line.
Coat each one of the triangles so formed with the tesa Easy Stick®.
Glue star points over one another.
Set with a clothespin.
Repeat the procedure with the other square. You see the finished parts on the Figure.
Lay the two parts offset over one another and mark the cutting points.
Underneath each of the markings apply a thick blot of tesa® Vielzweckkleber.
Now glue both parts on each other according to the markings. So that nothing slips, lay the star on a crate for drying. Punch a hole through one point of the star after drying and using a pretty ribbon hang up on the tesa Powerstrips® ceiling hook.